In a few clicks, your website will be multilingual. If you need help getting started with wpLingua and configuring it, here is the procedure…
1 – Install wpLingua
Above all, the first thing is to install wpLingua on your site. If you need help, check out our guide. Then, here are the few steps to configure multilingual:
2 – API Key Creation
Once the plugin is installed and activated, we invite you to go to its settings to get your API Key.


- Access wpLingua settings: in your WordPress dashboard, navigate to the wpLingua settings.
- Website URL: the website URL is detected by wpLingua and pre-filled.
- Mail address: the email address is detected by wpLingua and pre-filled. This is the Administration Email Address entered in the Settings > General tab. You can use another email address.
- Website language: the website language is detected by wpLingua and pre-filled. This is the language set in the Settings > General tab.
- Target language: that’s pretty much the only thing you have to do! Simply choose the language into which you want to translate your website from the drop-down menu. The first language is offered to you! Be careful not to make a mistake because you will not be able to change the language afterwards. If you have mistakenly validated an unwanted language, please contact our support by providing your API key and the desired language.
- Terms of use: check the box to accept our terms of use.
- Get your API Key: finish by clicking on the Get a free API key button.
- Receive your API key by email: the API key is sent to you by email, a confirmation message appears at the top of the screen.

- Copy your API key from the email: open your email inbox to retrieve your API key. Copy it.
- Paste the API key in your website: return to your site administration, to the wpLingua settings tab to paste the API key in the field provided for this purpose. Finish by clicking on the Set API key button.
3 – Your website translates automatically

- Set API Key: as soon as you click the button to validate the API key, your homepage is automatically translated into the language you have chosen. After that, we advise you to navigate to each page of your site to generate the automatic translations for the first time. This will allow site visitors to get translated versions of your site more quickly.
- Your site is being translated and will be ready soon: a notification appears at the top of the screen to let you know that translations are in progress. Please be patient, this may take a few seconds for a site of a few pages to a few minutes for larger sites.
- Your site is now multilingual: as soon as the generation of translations is complete, a message appears at the top of the screen to inform you. You can now visit your site.
4 – Customization and other plugin settings
After the first configuration, you will see new settings tabs appear under the wpLingua tab: Switcher, Dictionary, Exclusion, Website slugs and All translations.
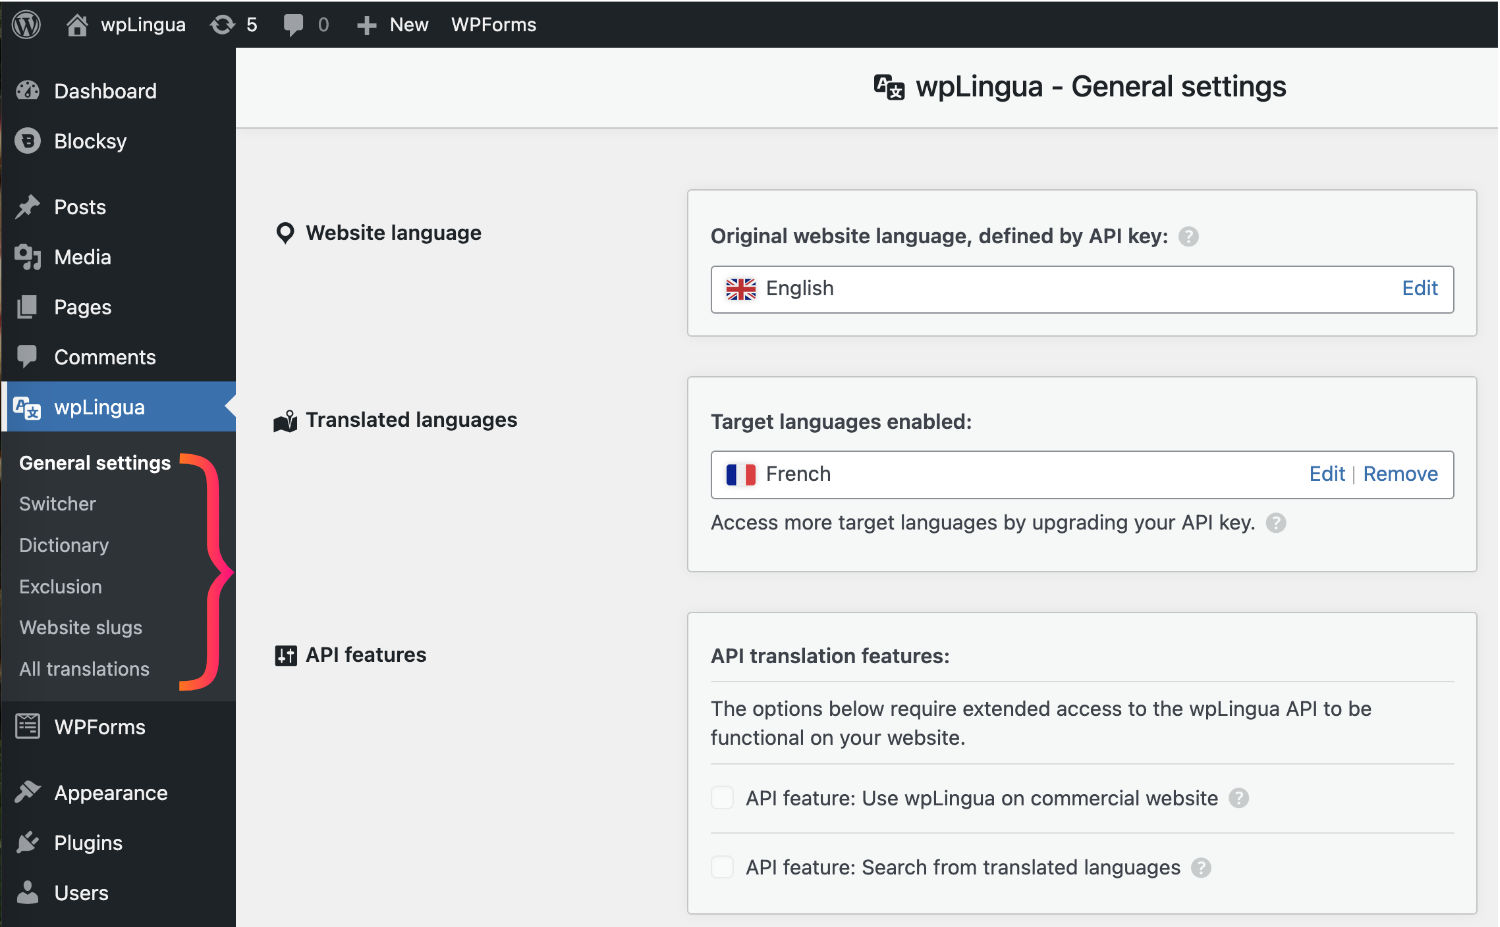
4.1 – Customize the language switcher
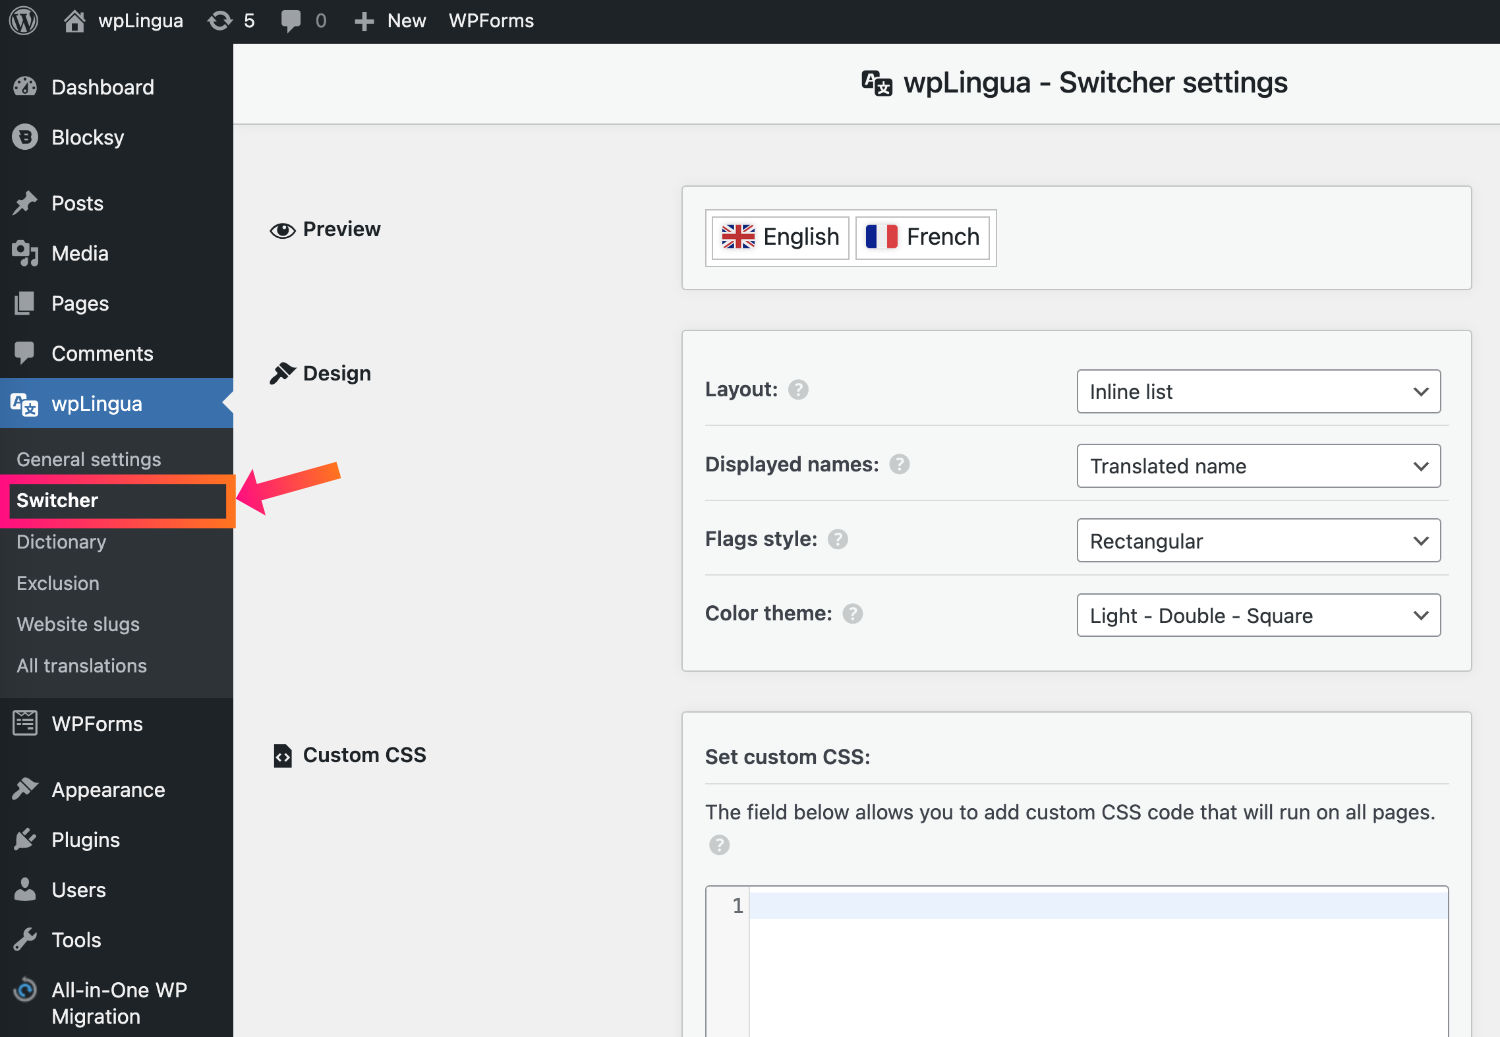
From the Switcher tab, you can configure the visual appearance of the language switcher.
We invite you to read the complete documentation to customize your language switcher.
4.2 – Define translation rules with dictionary
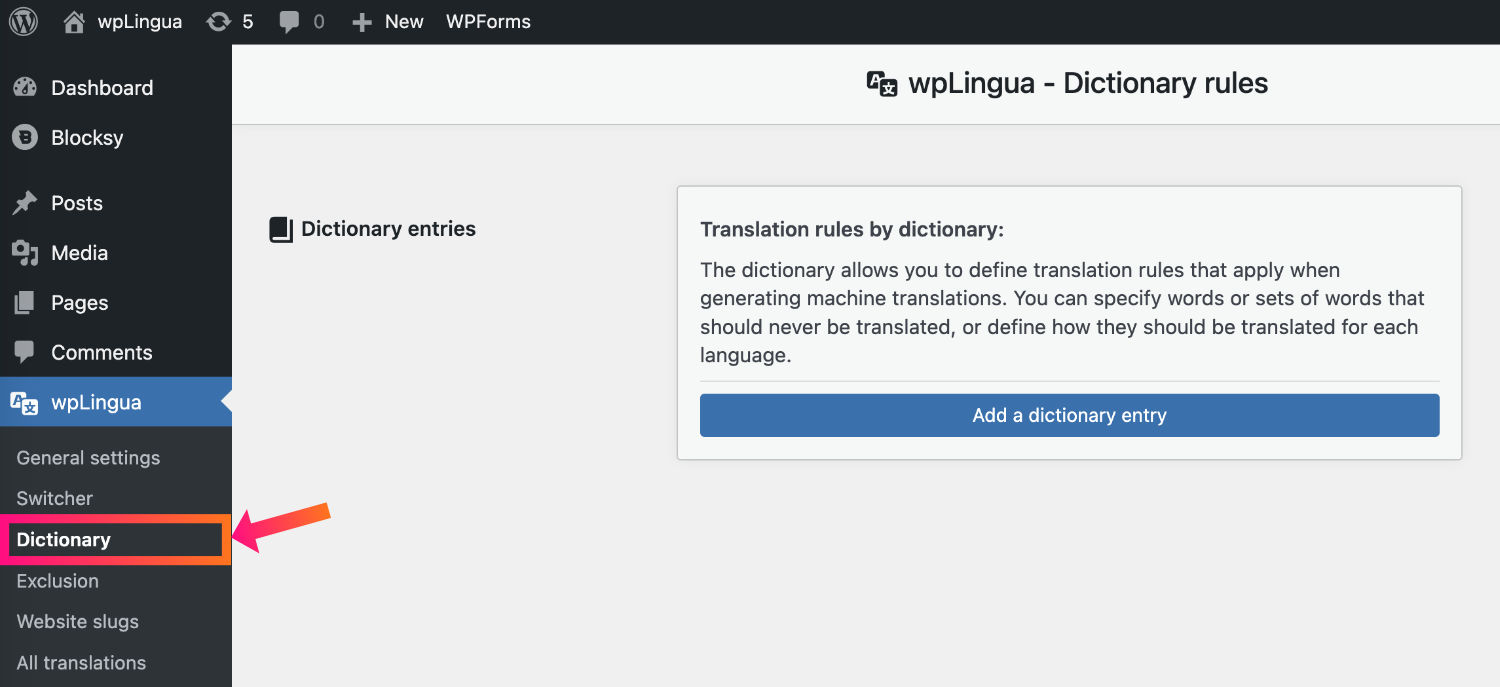
The dictionary allows you to define translation rules that apply when generating machine translations. You can specify words or sets of words that should never be translated, or define how they should be translated for each language.
4.3 – Exclude certain translations
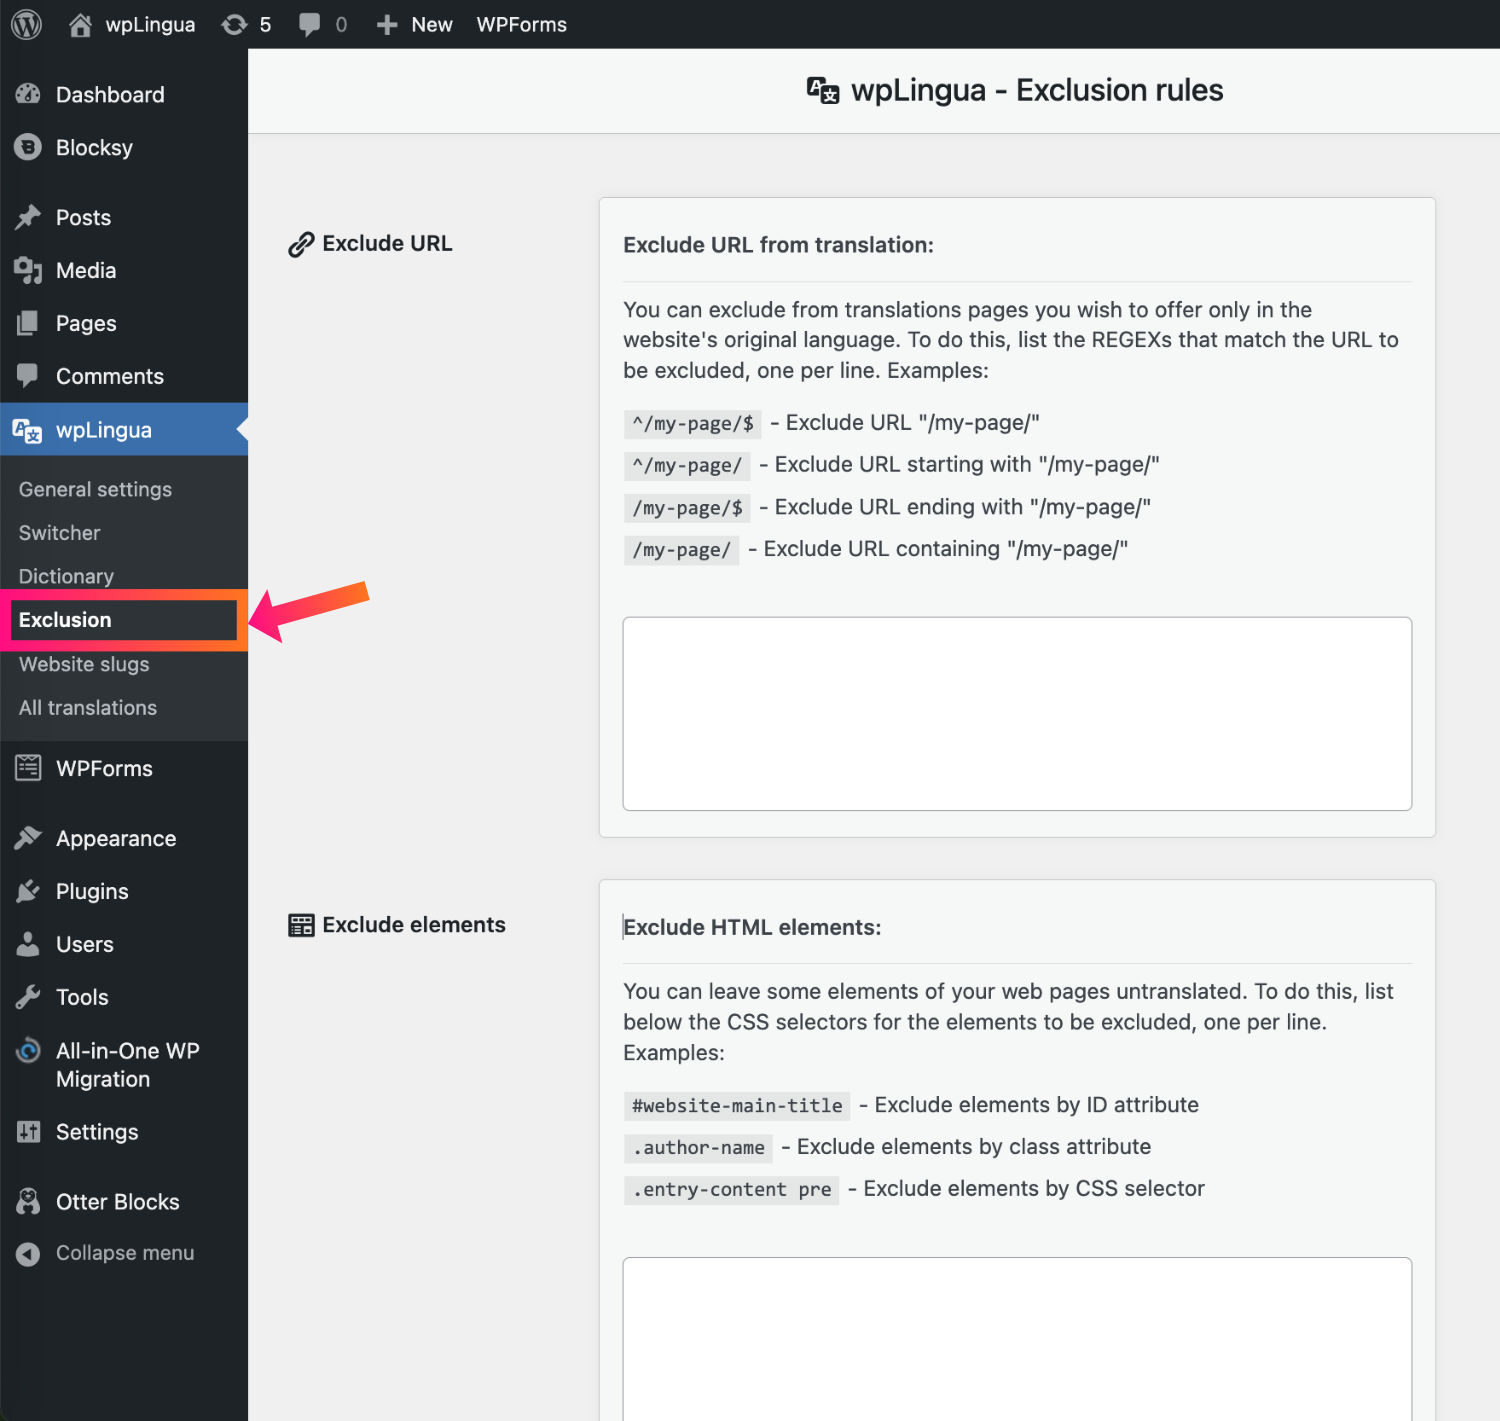
You may not want to translate certain pages or parts of your site. Go to the Exclusion tab to configure this:
- Exclude URL from translation: you can exclude pages from translation that you want to serve only in the original language of the website.
- Exclude HTML elements: you can leave certain elements of your web pages untranslated by excluding certain CSS selectors from translation.
4.4 – Translate slugs
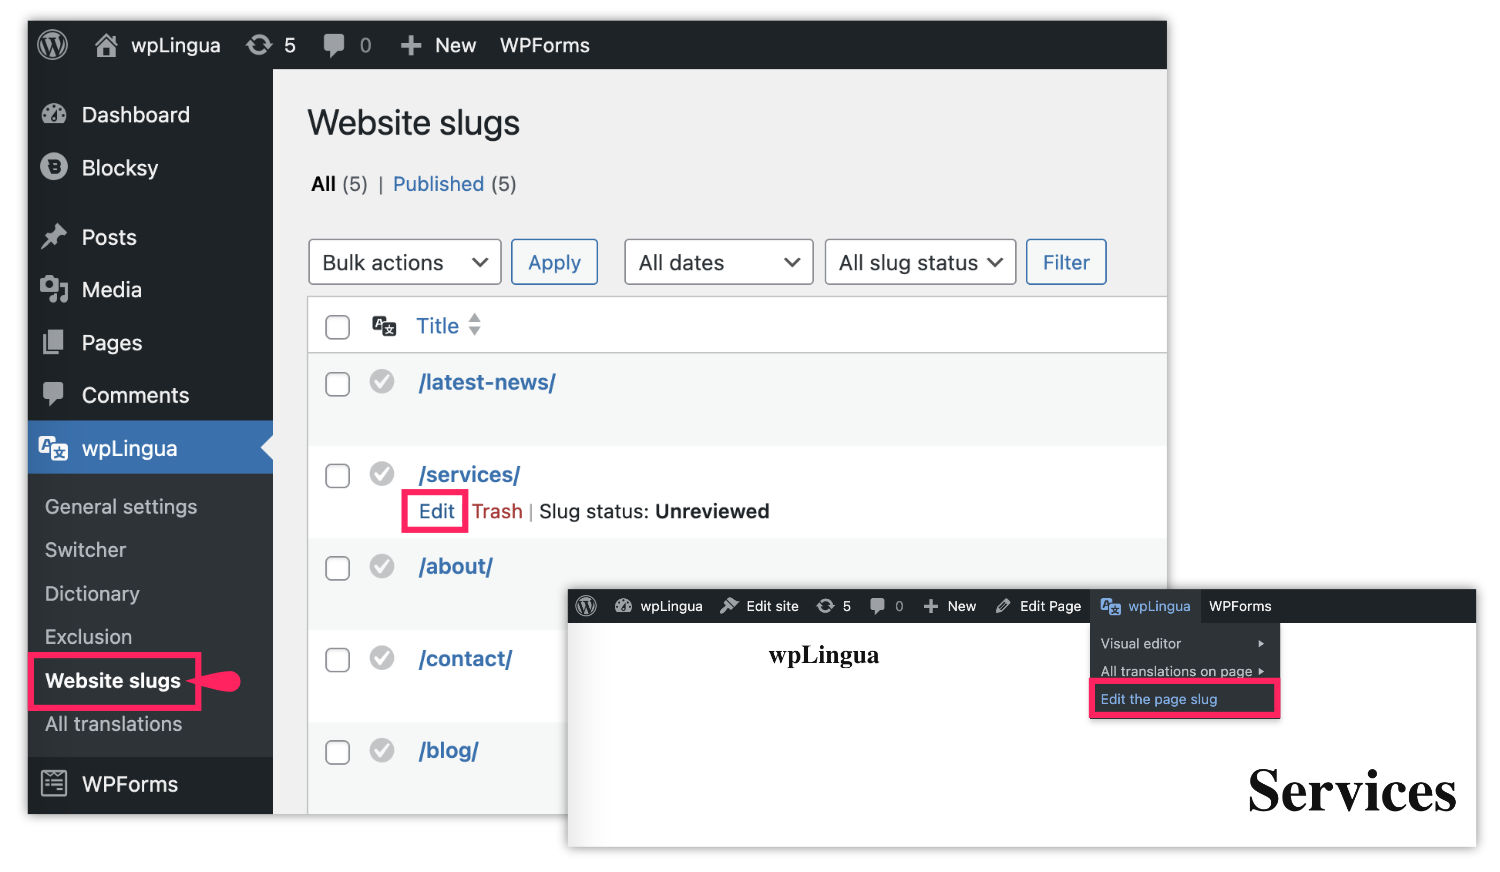
The plugin automatically discovers URLs on your website and lets you translate them. URLs are split into slugs (parts of the URL), making them easy to edit. This feature boosts SEO performance!
4.5 – Edit translations
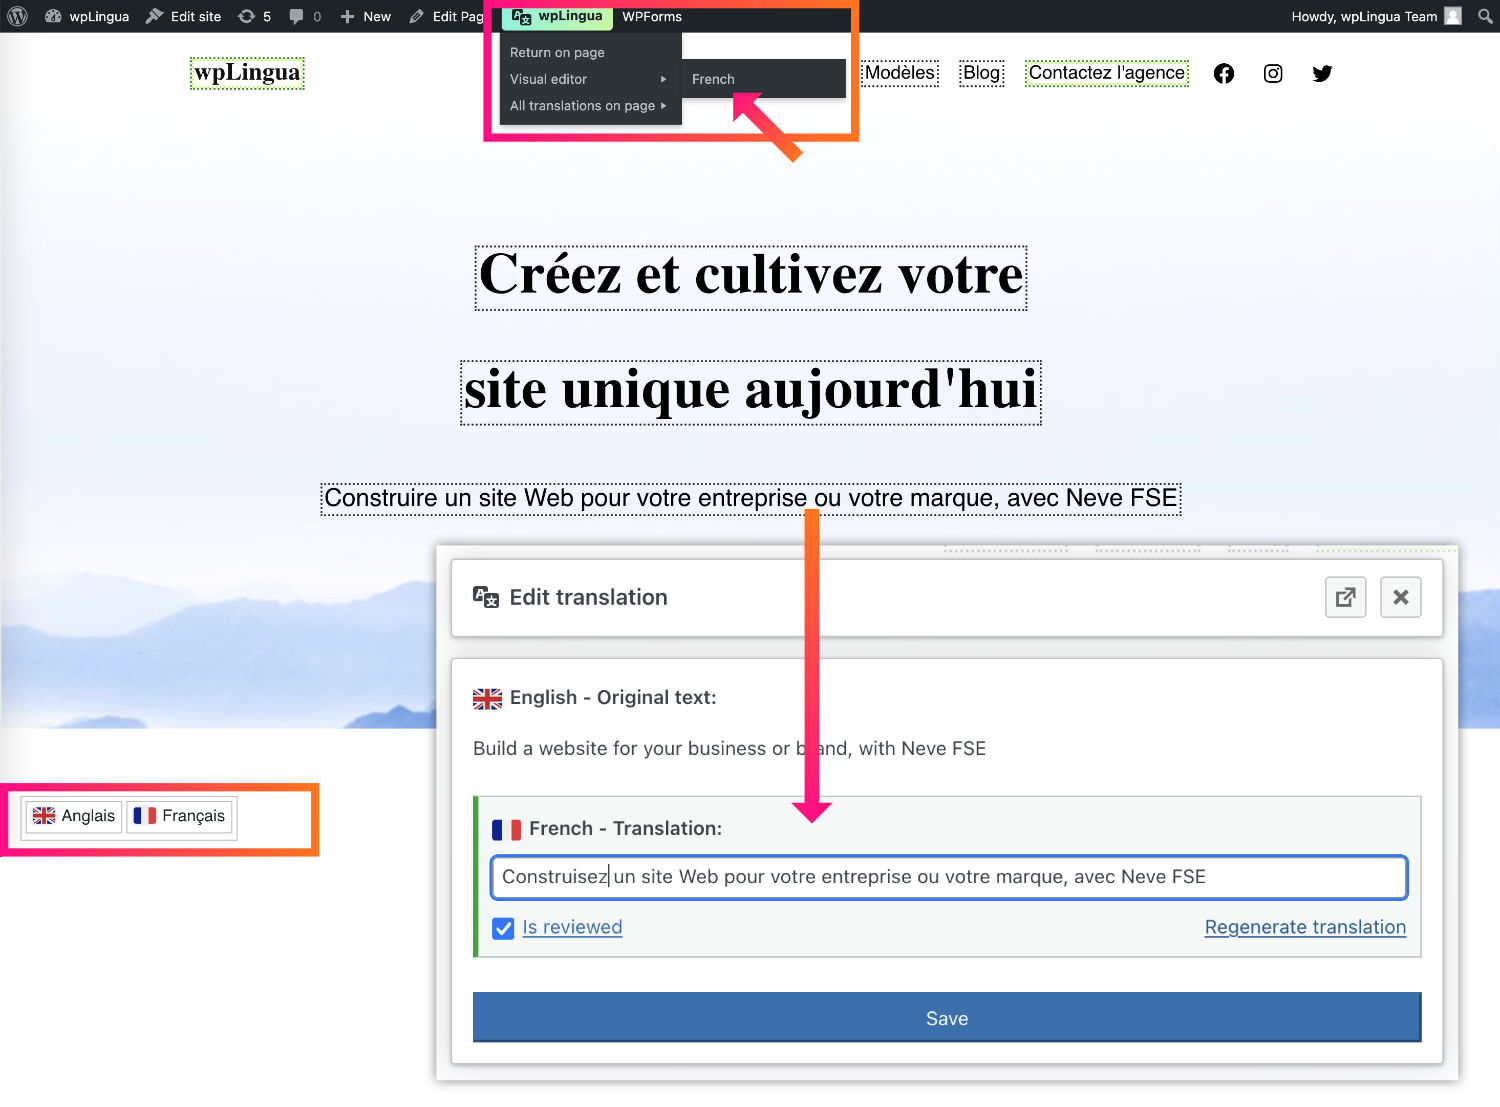
By visiting the translated pages of your site, you can activate the visual editor which will allow you to modify the translations directly.
Check out our complete guide to help you edit your translations.
5 – Support and Further Information
Do not hesitate to consult our documentation to go further. Contact support if you encounter any issues or have any questions.


